Disassembling Your Trampoline 101
You may wonder why it’s even necessary to take the thing apart after you’ve worked so hard to install it, but disassembling your trampoline is just as important as assembling it. This will improve the lifespan of your trampoline as it isn’t built for extreme weather conditions. Learning this DIY activity can save you the time and money of paying someone to get it done.
In this guide, you’ll learn how to take down a trampoline, why it’s essential, and the tools you need to do it.
Why should you disassemble your trampoline?
If you live in a climate that’s mild year-round or in a tropical region, disassembling your trampoline isn’t a necessity. Still, if you experience heavy snow and harsh summers, we recommend disassembling your trampoline to increase its lifespan. It’s also encouraged to dismantle your trampoline before a storm or hurricane as this prevents the wind from picking it up and blowing it away.
Extreme damp and cold weather can increase the chances of rust to the springs over time, and the harsh heat of summer contributes to the trampoline breaking down sooner than your warranty states. This is why it’s recommended to disassemble them and keep the parts inside.
One other advantage of disassembling the trampoline is that it is easier to relocate and reinstall if you decide you don’t like its initial placement.
Tools you’ll need to help you with the disassembly
Your trampoline kit usually comes with the tools you need to install it. These tools help you to disassemble the structure sooner:
- Hand gloves
- Screwdriver or Allen key and spanner
- Spring pull tool
- Hammer with a nail remover (for in-ground trampolines)
The steps needed to complete a disassembly
Follow these five steps in this order, and your disassembly should go smoothly.
1. Remove any net, ladder, or other accessories attached to the trampoline:
It’s easiest to remove the loosest attachments first. The accessories are usually undone by untying a string or removing a bolt with your Allen key or screwdriver.
2. Remove the safety mat:
Unfasten the straps holding the mat in place over the springs, then fold the safety mat into squares until it is small enough to fit in its storage box.
3. Remove the jump mat from the frame by detaching the springs:
This is where we recommend wearing gloves. Use your spring pull tool to ease the hook of the springs out of the groove in the trampoline frame. Remove the hooks attached to the jump mat, and be sure to keep all springs for reinstallation. Fold and store your jump mat just like you did with your safety mat.
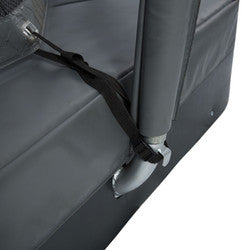
4. Detach the frame from the anchor tubes:
This one might take some extra elbow grease and those extra pairs of hands we mentioned to exert the right force to slip the frame out of the anchor tubes. Once detached, separate the structure into their pieces by removing any screws or simply pulling them apart (whichever your make and model requires).
5. Uproot the anchor tubes.
Using the end of the hammer that removes nails, ease the anchor tubes out of the ground and store them in the same place as your frame pieces for organization purposes.
We recommend checking each part for any necessary repairs and either repair them yourself or make a note of it, so you can get the repairs done before reinstalling. And that’s it. You’re done.
Conclusion
It’s important to disassemble your trampoline to increase its lifespan if you live in a climate that experiences extreme weather conditions. It can take an extra pair of hands to get it disassembled quickly, but it isn’t complicated to do. Having a few additional tools ensures your safety and makes the process move faster and smoother. Check out our easily disassembled trampoline kits and our FAQ section for more information on how to care for your trampoline.